Scanning probes
Scanning probes can acquire several hundred surface points each second, enabling measurement of form as well as size and position.
Scanning probes can also be used to acquire discrete points in a similar way to touch-trigger probes.
A range of solutions is available, suitable for all sizes and configurations of CMM.
Scanning explained

Scanning provides a fast way to capture form and profile data from prismatic or complex components.
While touch-trigger probes gather discrete points on the surface, scanning systems acquire vast quantities of surface data, providing a clearer picture of the form and shape of the workpiece. Scanning is therefore ideal for measurement applications where the form of a feature is a significant element of the overall error budget, or where complex surfaces must be inspected.
Scanning requires a fundamentally different approach to sensor design, machine control and data analysis.
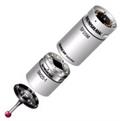
Renishaw scanning probes feature innovative, lightweight passive mechanisms (no motors or locking mechanisms) that exhibit a high natural frequency, making them suitable for high speed scanning. Isolated optical metrology systems measure the deflection of the stylus directly (not via stacked axes within the probe mechanism) for better accuracy and faster dynamic response.
How does a scanning system capture and analyse surface data?
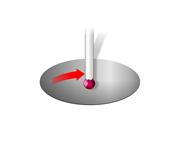
Scanning probes provide a continuous deflection output that can be combined with the machine position to derive the location of the surface. When scanning, the probe stylus tip is brought into contact with the feature and then moved along the surface, gathering data as it moves. Throughout the measurement, it is necessary to keep the deflection of the probe stylus within the measurement range of the probe.
For best results, this demands close integration of the sensor and machine control, as well as sophisticated filtering algorithms to convert the resultant data into useable surface information. Scanning drive algorithms can adapt to the contours of the part, changing the scanning speed to suit the rate of curvature (going faster on flatter surfaces) and adjusting the rate of data capture (taking more data where the surface changes quickly).
You may also be interested in...
You are currently looking at our scanning systems. You may also be interested to learn about the REVO 5-axis scanning system…


