현재 사용 중인 언어로는 이 페이지를 사용할 수 없습니다. Google Translate을 사용하여
자동 번역된 페이지
를 볼 수 있습니다. Renishaw에게는 이 서비스를 제공할 책임이 없으며 번역 결과를 저희가 확인하지도 않았습니다.
추가로 도움이 필요하시면
저희에게 연락해 주십시오.
Calibration service provider works faster & smarter to create more revenue
Jürgen Emslander runs a calibration service company called Geo Tec Messtechnik, and has recently upgraded his laser calibration system from the industry standard ML10 to the new Renishaw XL-80. The new system's portability and ease of use minimises transportation and set-up times, allowing more jobs each month.
Working around a client's production schedule is often problematic but the XL-80's ease of operation also gives short set-up and calibration times, avoiding disruption to machine production. Additionally, the optional XC-80 environmental compensator eliminates factory environment influences which can affect measurement accuracy.
Ultimately, machined components can only be as accurate as the machine that produces them. Therefore, it is crucial for production companies to control the accuracy of their machines, be they machining centres, lathes, borers, laser cutters, water jet cutting machines or CMMs . This is the only way they can guarantee the quality demanded by industry, particularly if they manufacture components for the aerospace or automotive industries. Also, many customers now demand that machining subcontractors document and provide certified evidence of machine accuracy that conforms to international standards.
To meet this increasing demand, many production companies and smaller machine manufacturers find it easier and more cost effective to have their machines measured and tested by service providers like Geo Tec Messtechnik, based near Stuttgart in southern Germany, using laser interferometer systems.

Reasons for upgrading to XL-80

Geo Tec has a long history as a user of the XL-80's predecessor, the industry standard Renishaw ML10 laser, but recognised the extra benefits of upgrading to the new system. With all the equipment required for testing packaged neatly into a portable case, the system is easily transportable, very quick and simple to set up and robust and practical for use in a shop floor factory environment.
Fast calibration for machine manufacturers
Geo Tec engineers visit manufacturers such as Edel, who make large multi-axis CNC machining centres, to check machines after final assembly. Jürgen Emslander has found his job much easier now he uses the XL-80 laser system: he says,
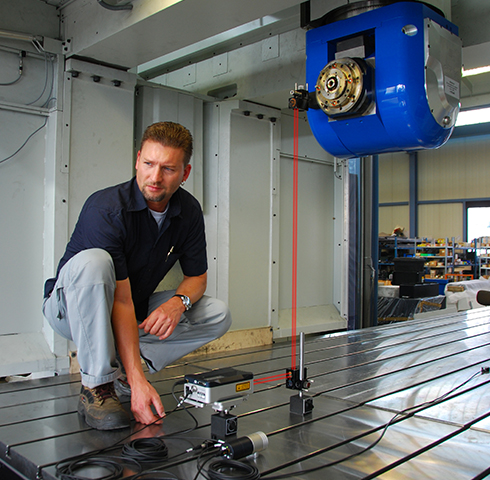
“The benefit of the compact design of the new XL-80 becomes apparent when calibrating machines such as Edel machining centres. It is small enough to use a magnetic base, allowing us to get inside the machine, making the job much quicker and easier, and allowing measurements where they were previously a problem.
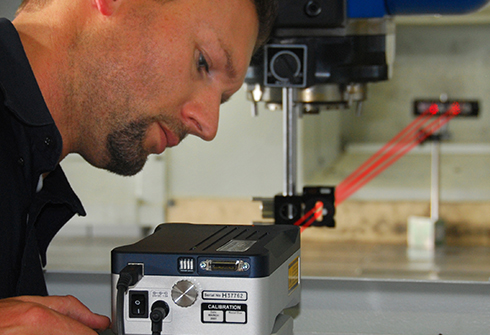
LEDs on the top of the XL-80 make set up very straightforward, we can monitor the beam strength without going back and forth to the PC.”
We have found Renishaw laser systems to be very reliable, so it is rare that I need to speak to the company on support issues. However, when I do need to get the system calibrated to conform to the requirements of the various standards, the quality of service that Renishaw provides, within 48 hours of me asking for it, is very important to me.
Geo Tec Messtechnik (Germany)
High accuracy to traceable standards
The laser interferometer has a certified linear measurement accuracy of ±0,5 ppm, regardless of the ambient conditions. The measuring results can be referred directly to the German calibration standard of the PTB (Physikalisch-Technische Bundesanstalt, in Braunschweig), since Geo Tec regularly sends the laser interferometer for calibration by Renishaw, guaranteeing that measuring results are absolutely reliable.
Rapid service and support
Jürgen Emslander is un-ashamedly pro-Renishaw, “We have found Renishaw laser systems to be very reliable, so it is rare that I need to speak to the company on support issues. However, when I do need to get the system calibrated to conform to the requirements of the various standards, the quality of service that Renishaw provides, within 48 hours of me asking for it, is very important to me.”
Minimising disruption to production
Many production companies have their machines measured and tested regularly to achieve quality requirements, controlled with periodic testing and, if necessary, re-calibration.
Geo Tec specialises in this field, offering production companies a service involving documenting the accuracy of machines in regular use. This means Geo Tec needs to work to a fast and flexible schedule. Automotive component manufacturers, for example, need all the machine tools checked on a regular basis to ensure they are working to the maximum capacity and efficiency. It is also essential to check any machine involved in a collision, in which case, the service provider is able to advise the company on the necessary repairs, which they can make immediately if required.
The simple configuration of the XL-80 system also means short testing times. This allows the service provider to perform measurements when machines are not running e.g. at night or at weekends. The mirrors can be quickly and easily attached to the machine with magnetic stands, whilst the laser itself sits on a stable tripod or magnetic base.
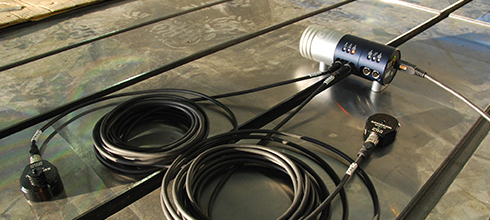
The clearly visible red laser beam can be aligned with the aid of the simple but sophisticated beam splitter Once aligned, the system can start taking automatic measurements. External influences, e.g. fluctuations in air pressure, are measured continuously and compensated automatically by the XC-80 compensator unit. Consequently, the XL-80 system can be used in any factory, whatever the conditions.
The laser interferometer test procedure
During a typical test on a machine tool, actual machine positions are compared to where the machine ‘thinks' it is, at numerous positions over the full travel of the machine's slides. Correction data is then calculated by the Renishaw software to compensate for inaccuracies. As well as linear position, the system can also measure the straightness of the slide guides, the flatness of the tables and the angular difference in the movement of axes in relation to each other.
The sophisticated PC-based software offers the operator many advantages. The measuring cycle is largely pre-programmed with the operator merely deciding on the necessary parameters. These parameters include axes to be tested, the number of intermediate positions to be measured and the number of measuring passes. The measuring process then runs automatically: the control system moves the machine slides to the relevant positions, e.g. at 50 mm intervals, the laser interferometer measures the exact position with an accuracy of less than ±0,5 ppm and stores the data.

Evaluating tests
Once data has been captured, the evaluation software included with the system allows compensation of the position differences. It shows the measured data in the form of a table and a graph for simple analysis. The software evaluates the measured data statistically, either according to its own criteria or according to the national or international standards (e.g. VDI/DGQ 3441, VDI/VDE 2617, NMTBA, ISO 230-2 and BS4556). The graphs clearly show the permitted limit values and differences, allowing the operator to assess the measured data quickly and reliably. In many cases, compensation values needed for correction or repair can be derived directly from this information, which, when fed back into the machine control, correct some or all of the inaccuracy before mechanical adjustments are made.
The evaluation software also reduces the work on compensating mechanical faults through the control system. It automatically provides the correction data required in the necessary data formats for practically every numeric control system in use today. A simple press of a button transfers the data to the compensation computer or memory of the CNC control system, greatly reducing the time needed for the entire measuring and compensation process. Following the compensation process, the operator can start another measuring cycle to check that the compensation was successful.
Printed calibration certificates
In one simple step, the laser interferometer software will enable calibration certificates and measurement reports with graphs and tables to be printed out, showing the state of the machines before and after compensation or repair. When regularly performing measurements and tests, the comprehensive documentation can cover the whole history of the machine. This in turn means that the client can meet demands for complete and transparent quality assurance.


