Ta strona nie jest obecnie dostępna w Twoim języku. Możesz zapoznać się z tłumaczeniem automatycznym, korzystając z usługi Google Translate. Nie jesteśmy odpowiedzialni za świadczenie tej usługi, ani też wyniki tłumaczenia nie były przez nas sprawdzane.
Jeżeli chciałbyś uzyskać więcej pomocy skontaktuj się z nami.
New RFP fringe probe for the REVO 5-axis system at EMO 2019
1 September 2019
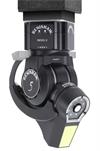
Renishaw is pleased to announce the launch of the new RFP fringe probe for use with the REVO 5-axis measurement system on co-ordinate measuring machines (CMMs).
The RFP probe increases the multisensor capability of the REVO system by adding non-contact structured light inspection to the existing product range, which now offers five different probe families, each specifically designed to maximise the advantages of 5-axis motion and infinite positioning. All REVO system probes can be changed automatically and include tactile scanning, touch-trigger, surface finish, non-contact structured light and vision probes. They are all used within a common co-ordinate reference frame, providing the choice of an optimum tool to measure multiple features all on a single CMM platform.
The RFP projects a fringe pattern onto the part surface and the probe's camera captures the variation in fringe pattern to build a point cloud of 3D surface data. The data cloud is then evaluated by the 3D metrology software to deliver the inspection results. Non-contact structured light inspection with the RFP delivers clear advantages over traditional tactile probing techniques for freeform surfaces and complex geometry, such as additively manufactured parts, aerospace blades and blisks, automotive cylinder head combustion chambers, and delicate surfaces not suited to tactile measurement.
Unlike other non‑contact structured light systems, the RFP fringe probe does not require reference markers to stitch together data from different areas, as this is done automatically by the REVO system. Coating the part in a matt substance is also unnecessary thanks to the automatic exposure compensation of different surface colours, textures and reflectivity, ensuring optimal data results.
Two new software tools provide easy-to-use inspection planning and digitising. The RFP inspection planner is a tool for path planning and generating DMIS part programs from CAD, whilst the RFP digitiser app guides users around parts without models, collecting data as part of a reverse engineering process.
The RFP probe is automatically and repeatably interchangeable with all other probe options available for the REVO system, so the data from each sensor shares a common datum reference. This flexibility means that the optimum tool can be selected to inspect a wide range of features, all on one CMM platform, which is managed by an I++ DME compliant interface and Renishaw's MODUS™ metrology software.
From September, 16th – 21st, visitors will be able to see the new RFP system demonstrations on Renishaw's stand in hall 6 at EMO Hannover 2019.
For further information, visit www.renishaw.com/cmm
Downloads
For further images, videos, company biographies or information on Renishaw and its products, visit our Media Hub.


