Navigation
Installation procedure
Mounting the shank on the probe head
- Hold the shank in the recess on the top face of the MH8
- Rotate the shank until the three screw holes are aligned
- Fix the shank in place using only the M3 × 5 mm screws (supplied)
- Progressively tighten using the 2.5 mm A/F hexagon key (supplied)
Mounting the head on the CMM
The head will normally be attached to the quill of the CMM using a standard shank, specified by the CMM manufacturer.
Standard shanks are listed in the ‘Part number summary'.
Special or customised mounting arrangements are possible. Please contact your supplier or Renishaw, for details of our custom products service.
The mounting must be absolutely rigid, as any movement during normal operation of the head will add errors to the measurement system.
If the head is replaced or repositioned in the quill, it will be necessary to requalify all of the head positions in current use.
Electrical connection
Connection is by means of a 5-pin DIN connector on the side of the head.
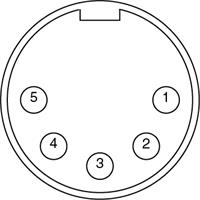
The pin numbering functions are given in the table below:
Pin number | Designation |
1 | LED cathode |
2 | Ground |
3 | LED anode |
4 | Probe circuit |
5 | Probe circuit |
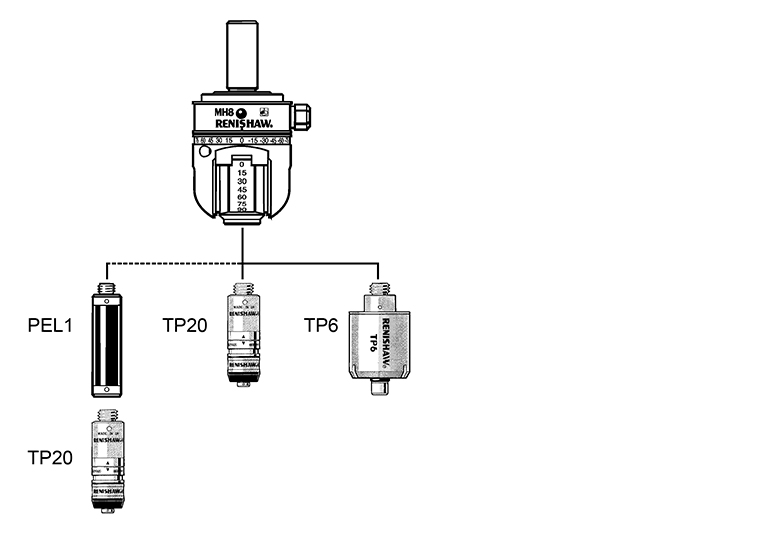
Mounting the probe to the probe head
If fitting a TP20 probe, mount the probe body to the probe head before fitting the probe module and stylus.
- Screw the threaded end of the probe into the M8 connector on the probe head until it is finger tight
- Fit the S1 ‘C' spanner (supplied) to the location holes in the probe body and tighten by hand
- The recommended tightening torque is 0.3 Nm - 0.5 Nm
Refer also to the user's guide for the probe type being used.
Extension bars
Probe reach may be extended by 50 mm using a PEL1 extension bar. Use of the PEL2, PEL3 or PE series extension bars is not recommended.