Tato stránka není v současné době k dispozici ve vašem jazyce. Automatizovaný překlad můžete zobrazit pomocí nástroje Google Translate. Neodpovídáme za poskytování této služby a výsledky překladu jsme nekontrolovali.
Potřebujete-li další pomoc, kontaktujte nás.
XM-60 multi-axis calibrator significantly reduces time taken to measure volumetric precision errors
Background
There are many elements to consider when measuring the errors relating to volumetric precision and to measure them all would take a long time. For example, there are tracker type volumetric precision measurement systems where, as the size of the machine increases, the measurement time required increases by square orders of magnitude.
Volumetric Accuracy Research Institute Co. Ltd. (VARI), specialises in accuracy measurement analysis and machining accuracy improvement services for production lines; especially machine tool accuracy measurement and correction parameter creation services. Through a research collaboration with DMG Mori Seiki Co., Ltd. and Kyoto University, it supports future development of machine tools. VARI provides an additional service to improve the spatial accuracy of machine tools by using correction parameters calculated using its bespoke algorithm. By improving spatial accuracy, machining accuracy can be improved to reduce rework.
The spatial accuracy aimed for by VARI is different from conventional geometric accuracy. Traditionally, motion accuracy such as linear positioning and straightness accuracy has been used for the evaluation of machine tools. There are standards, ISO 230-1 and JIS B 6190-1 for motion accuracy measurement, which are used by many machine tool manufacturers for pre-shipment accuracy inspection. However, since the motion errors interact with each other, it is not easy to envisage the actual position deviation of the tool tip point from the motion accuracy. Therefore, VARI developed the idea of spatial accuracy that directly evaluates three-dimensional position deviation for each position of the tool tip point.

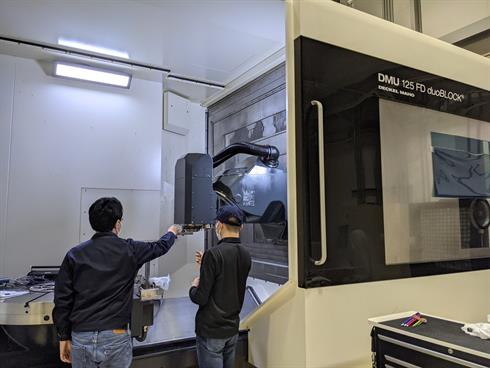
Machining centre for accuracy measurement

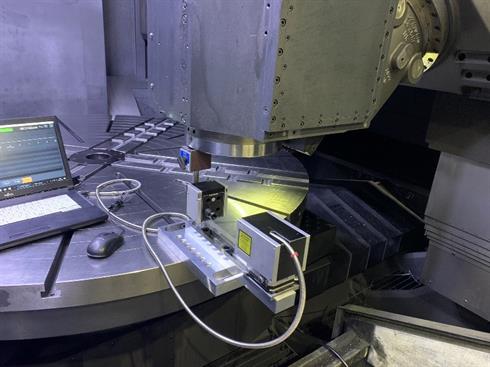
Measuring machine tool accuracy with the XM-60 multi-axis calibrator
To evaluate the machining capability of a machine tool, it is necessary to measure all machine axis errors. An object's position in space is defined by six degrees of freedom, similar to the relationship between a cutting tool and a workpiece in a machine tool. In order to directly and simultaneously measure all errors, the Volumetric Accuracy Research Institute Company introduced the XM-60 multi-axis calibrator. As a result, we succeeded in reducing labour costs and accurately evaluating machine performance.
Volumetric Accuracy Research Institute Co., Ltd. (Japan)
Challenge
With efforts to improve efficiency in machining, reduce scrap and minimise costs, there is an increasing need to better understand the manufacturing process. Knowing a machine's cutting performance before machining is fundamental for manufacturing.
When evaluating the accuracy of a machine, laser interferometers are becoming widely used throughout the world due to their high accuracy. However, the moving axis of a machine can not only have errors relating to position, but additionally to its vertical alignment and straightness. To measure each of these errors in isolation can take a lot of time. With machines, and the parts being machined on them, becoming more complicated, it is not enough to simply measure the positional performance. As the spindle moves, errors related to vertical alignment and straightness occur due to friction and other influences on the spindle structure which result in a difference between the indicated position of the tool tip and the actual position. Subsequently, large errors in feature position, deviations to the contours and surface may occur and the manufactured parts may not fit to tolerance.
As deviations occur in manufactured parts due to the errors in each machine axis, it is necessary to measure all the errors of each of the machine axes to evaluate the machining capability. The position of an object in space is defined by six degrees of freedom, as is the relationship between a cutting tool and a workpiece in a machine tool. As all the errors can be measured directly and at the same time, the manufacturing time can be reduced, and the machine performance accurately evaluated.
Solution
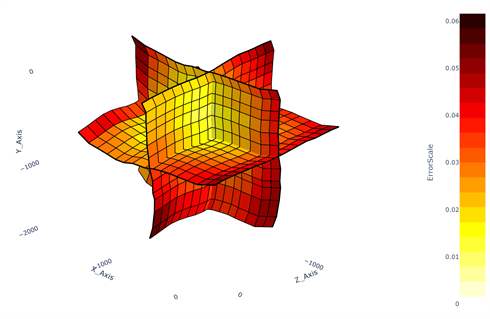
The Renishaw XM-60 multi-axis calibrator introduced a completely new concept for VARI and allowed the measurement of six degrees of freedom in one set-up regardless of the axial direction. Machine tool accuracy is usually identified by measurement of 21 different motion errors. However, since the motion errors interact with each other, it is not easy to determine the actual deviation of the tool tip from the motion accuracy. As a solution, the spatial accuracy error map can be used to visualise the accuracy distribution in the machining space. The Volumetric Accuracy Research Institute provides an independent service that measures the spatial accuracy of machine tools, to create an error map which can be used to improve overall accuracy.

Spatial error map
Results
When using the XM-60 multi-axis calibrator, VARI realised the spatial accuracy measurement time could be significantly reduced, especially for large machines. As one customer of the service explained, “You can select past measurement data from a list and compare multiple results easily”.

