Navigation
Fitting an eight port ACR3 system to MRS / MRS2
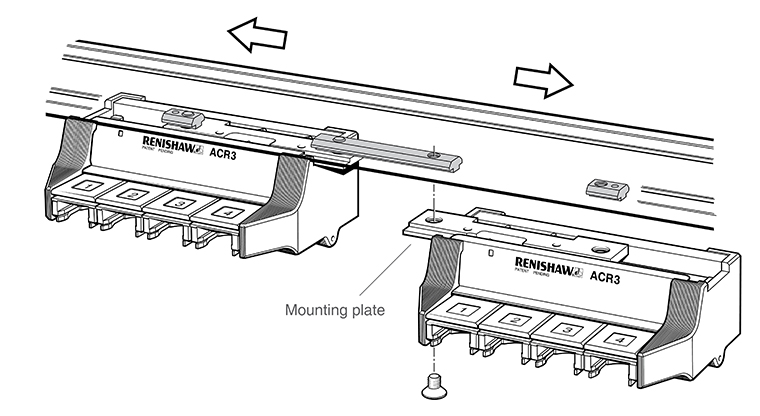
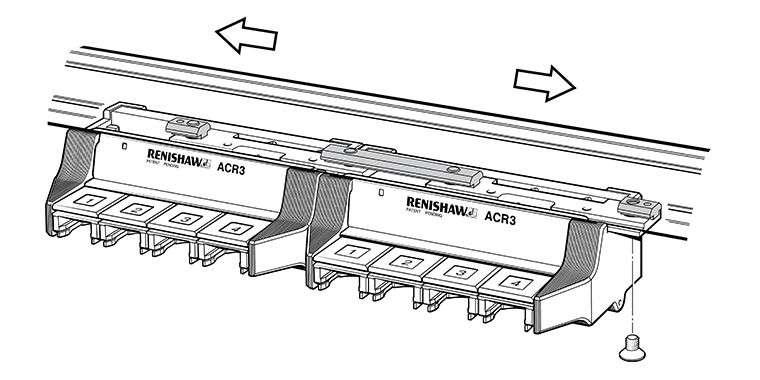
The long 'T' nut is designed to allow two 4 port units to be linked, as shown below.

The distance required between the two racks is 'set' by the 'T' nut.
CAUTION: Moving parts, beware of pinch hazards. The MRS / MRS2 must be securely bolted to the machine table.
1. Mount ACR3 ports 1-4 as detailed in "Fitting a four port ACR3 system to MRS / MRS2". However, ensure the long 'T' nut is positioned as indicated above.
2. Slide ACR3 to the fully unlocked position (left-hand side of travel). Push ACR3 ports 5 - 8 into the fully locked position (right-hand side of travel). Pass the bolt through the left hand countersunk clearance hole into the long T nut. Finger tighten.
NOTE: The long 'T' nut must be used when linking two ACR3s.
CAUTION: Ensure rack does not overhang the MRS / MRS2 in either the locked or unlocked position.
3. Push the ACR3 ports 5 - 8 into the fully unlocked position to the left. Place bolt through the right-hand countersunk clearance hole into short 'T' nut and finger tighten.

4. Position the ACR3 on the MRS / MRS2 so that the rack can move freely from its unlocked position to its locked position.
5. Using the 5 mm hex key (supplied), tighten the four countersunk bolts.
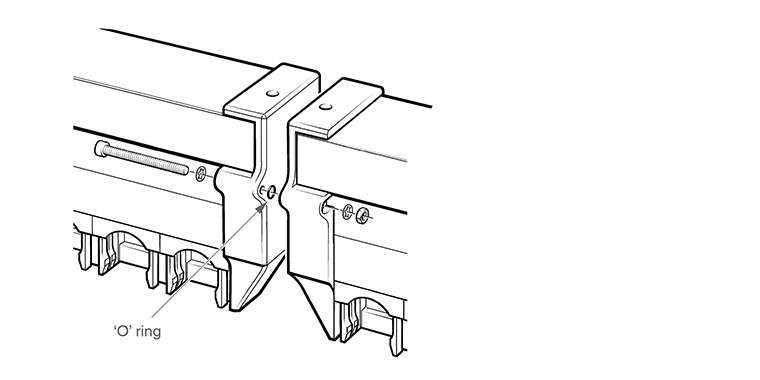
6. Using the connection bolt and O-ring supplied with the ACR3 kit, join the two ACR3 units as shown below. Use the O-ring supplied to separate the two racks.

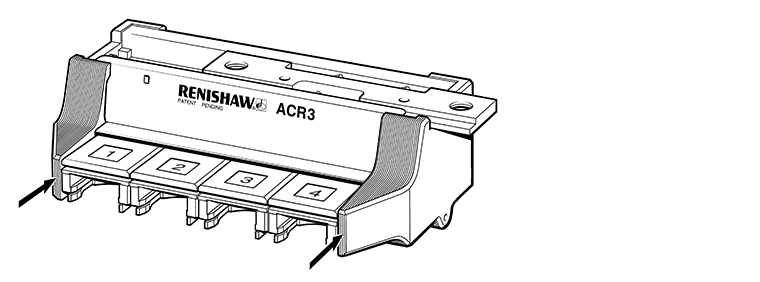
7. Check the alignment of each of the ACR3's with respect to the CMM axis. This is achieved by taking two points on the front of each ACR3 unit. The 'run out' of each of the ACR3 units, with respect to the CMM axis, should be less than 0.5 mm, between the points on each rack.

8. Adjustment of the ACR3's (with respect to the machine axis) should be completed by releasing the necessary mounting bolt, manually repositioning the ACR3 and then re-tightening the bolt.