Denna sida finns för närvarande inte på ditt språk. Du kan
översätta
den automatiskt
med Google Translate. Vi ansvarar inte för att tillhandahålla denna tjänst och
vi har inte kontrollerat översättningsresultaten.
Kontakta oss om du behöver ytterligare hjälp.
Substrate mastered scale on a CMM
The thermal behaviour of encoder scale is an important consideration when selecting any encoder system. Renishaw's encoder scales are effectively either thermally independent of the substrate (floating) or thermally dependant on the substrate (mastered).
Floating scale expands and contracts according to the thermal characteristics of the scale material, whereas mastered scale expands and contracts at the same rate as the underlying substrate. These scale mounting techniques offer a variety of benefits for various measurement applications: this article presents an example case where mastered scale might be preferred.
Co-ordinate measuring machine (CMM)
CMMs are used to capture three-dimensional measurement data on high precision, machined components, such as engine blocks and jet engine blades, as part of a quality control process. There are four basic types of co-ordinate measuring machine: bridge, cantilever, gantry and horizontal arm. Bridge-type CMMs are the most commonplace.
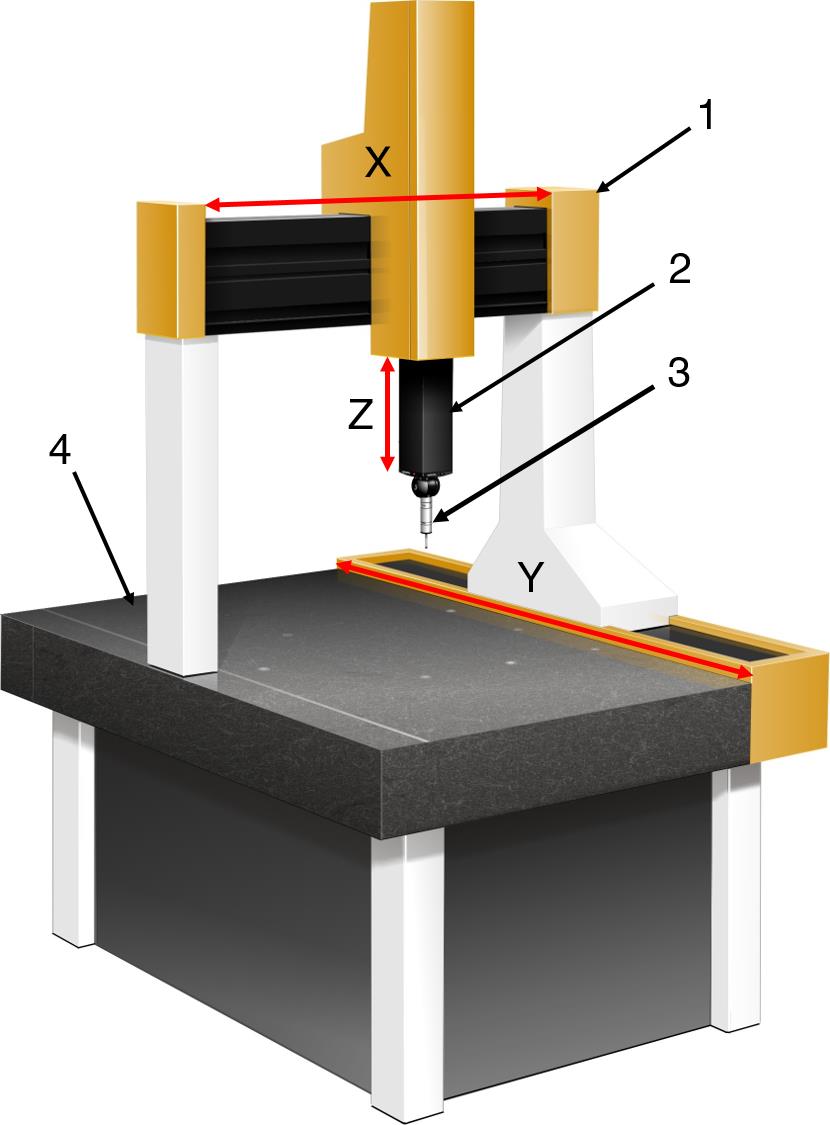
In a CMM bridge design, a Z-axis quill is mounted on a carriage that moves along the bridge (along the X-axis, see figure 1). The bridge is driven along two guideways in the Y-axis direction. A motor drives one shoulder of the bridge, while the opposite shoulder is traditionally undriven: the bridge structure is typically guided / supported on aerostatic bearings. The carriage (X‑axis) and quill (Z-axis) may be driven by a belt, screw or linear motor.
CMMs are designed to minimise non-repeatable errors as these are difficult to compensate in the controller. High-performance CMMs comprise a high thermal mass granite bed and a stiff gantry / bridge structure, with a low-inertia quill to which is attached a touch-trigger probe to measure discrete points on a workpiece. The data are then used to ensure that parts meet predetermined tolerances. High precision linear encoders are installed on the separate X, Y and Z axes which can be many metres long on some gantry-type machines.
1 = Bridge
2 = Quill
3 = Touch probe
4 = Granite bed
Example
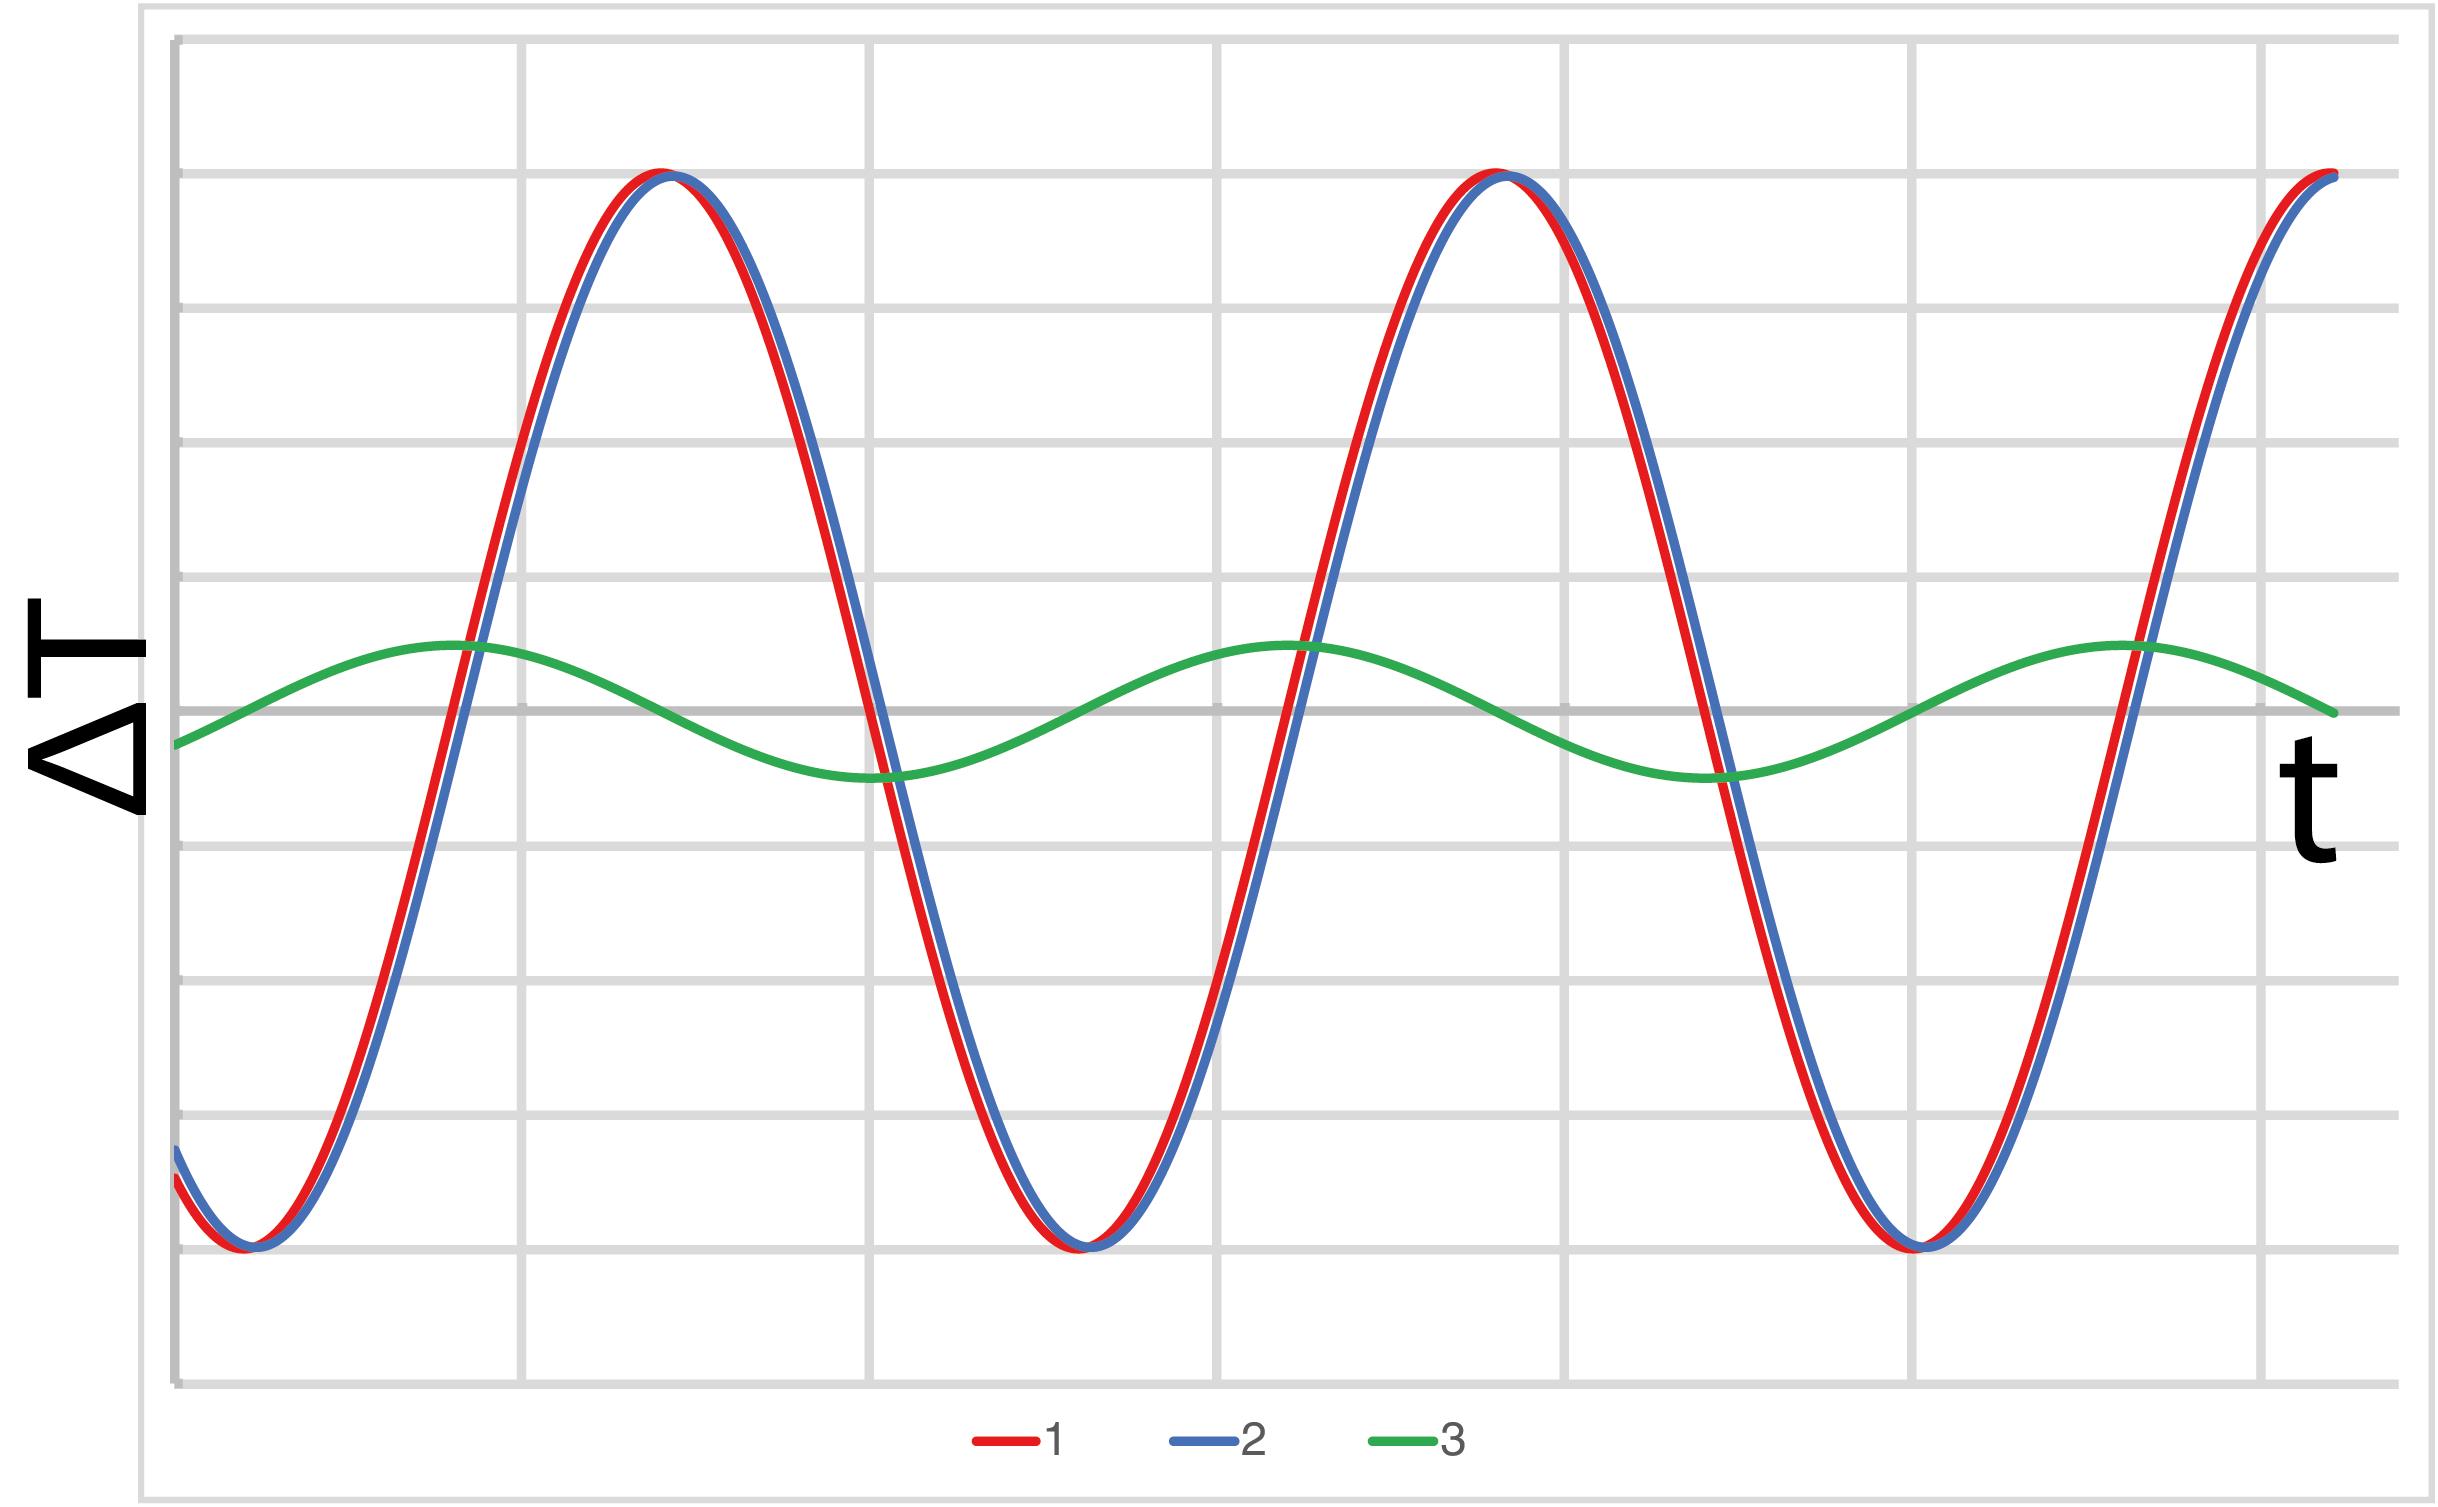
A granite bridge-type CMM is operated in an air-conditioned room with an average temperature of 20 ±2 °C. The room temperature cycles three times every hour such that the high-thermal mass granite maintains a constant average temperature of 20 °C.
A floating linear encoder scale is installed on each axis (X, Y and Z). The stainless steel scale is largely independent of the granite substrate and rapidly responds to changes in air temperature due to its high thermal conductivity and low thermal mass, which is significantly lower than the thermal mass of the granite bed. This leads to a maximum expansion or contraction of the scale over a 3 m axis of approximately 60 μm. This expansion can produce a substantial measurement error which is difficult to compensate due to its time-varying nature, as shown in figure 2.
Substrate mastered scale is the preferred choice in this case: a mastered scale would only expand with the coefficient of thermal expansion (CTE) of the granite substrate and would, therefore, exhibit little change in response to small oscillations in air temperature. Longer term changes in temperature must still be considered and these will affect the average temperature of a high-thermal mass substrate. Temperature compensation is straightforward as the controller only needs to compensate for the thermal behaviour of the machine without also considering the encoder scale thermal behaviour.
Summary
Encoder systems with substrate mastered scales are an excellent solution for precision CMMs with low CTE / high thermal mass substrates and other applications requiring high levels of metrology performance. The advantages of mastered scales include simplification of thermal compensation regimes and potential for reduction of non-repeatable measurement errors due to, for instance, air temperature variations in the local machine environment.
For further information on linear encoder systems, please visit www.renishaw.com/opticalencoders
For more images, videos or information on Renishaw and its products, visit our mediahub.


