Navigation
System installation
This section describes the connections and cables used on the PHS1 servo positioning head system.
See following section for full drawings of system installation and connections.
See figures below for schematics of system connections and wiring.
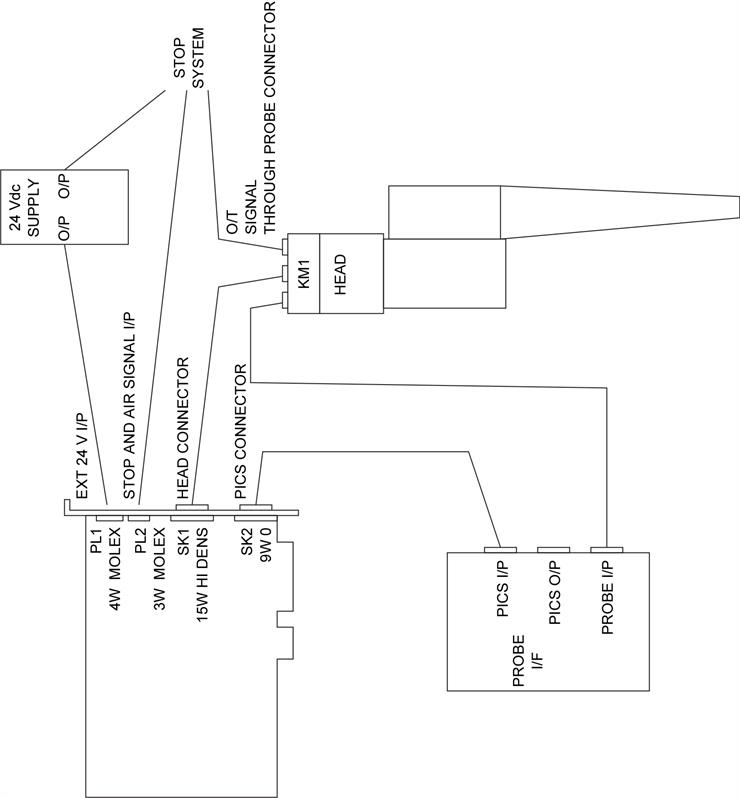
NOTES:
- Air good signal switches to +24 V common (0 VM)
- STOP requires +24 V supply across PL2 pins 1 and 2
- O/T switch opens when head overtravels
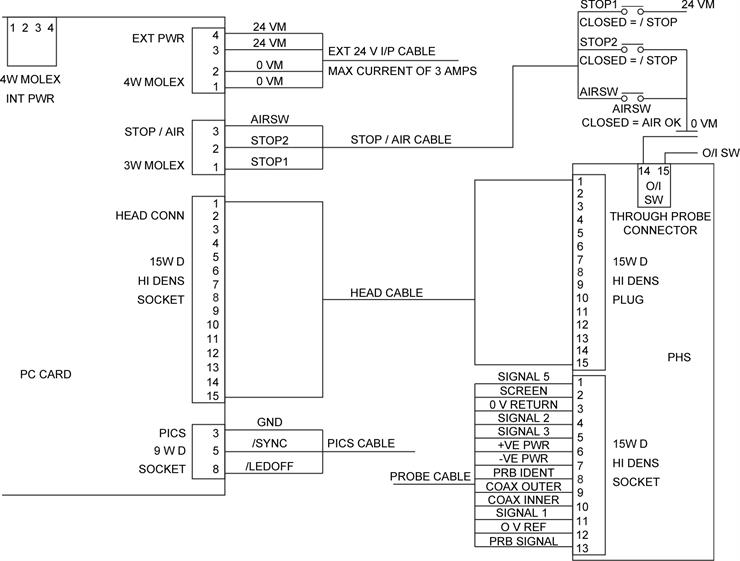
PC card connectors
The following sections give pin connection details for connectors on the PC interface card.
Head data connector
The head data connector on the PC card is a 15-way high density D socket.
PICS connector
The Renishaw PICS (product interconnection signal) system allows a standard method of connection for all real time signals used by Renishaw probing products and gives access to probing system control features.
Refer to the PICS installation guide (Renishaw part number H-1000-5000) for a detailed description of PICS and for suggested termination circuits.
A standard Renishaw PL24 (5 m) or PL25 (0.3 m) cable can be used to connect this socket to the PICS OUTPUT connection on a Renishaw probe interface.
PICS connector - 9-way D socket:
Pin number | Signal |
|---|---|
1 | Not connected. |
2 | Not connected. |
3 | GND. |
4 | Not connected. |
5 | /SYNC (input signal connected to probe interface PICS OUTPUT) Default: Edge (high) = trigger This signal can be used as a probe trigger input to the PC interface card to latch the PHS1 head position. Refer to the PHS1 programmer's guide (Renishaw part number H-1000-6005) for further information. |
6 | Not connected. |
7 | Not connected. |
8 | /LEDOFF (input signal to probe interface PICS OUTPUT) Low = On and triggered |
9 | Not connected. |
External 24 Vdc input connector
- Head motor power can be supplied either through this external connector or through an internal connector
- Maximum total current through connector to be 3 A
- This unit must be supplied from a 24 Vdc SELV supply complying with the essential requirements of BSEN61010 or similar specification
External 24 Vdc input connector - 4-way molex:
Pin number | Signal |
|---|---|
1 | 0 VM |
2 | 0 VM |
3 | 24 VM |
4 | 24 VM |
Air / stop signal input connector
- Connector rated at 30V dc, 1 amp max.
Air / stop signal input connector - 3-way molex:
Pin number | Signal |
|---|---|
1 | STOP1 (connect to 24 VM) |
2 | STOP2 (connect to 0 VM) |
3 | AIRSW |
NOTES:
1. At least one of the STOP lines must be through a STOP button (open = STOP).
2. Connect AIRSW to 0 VM through a pressure switch (switch closed = pressure OK).
Internal 24 Vdc input connector
- This internal 24 V connector can be used to supply head motor power instead of the external 24 V connector
- Applying 24 V through this connector will automatically select the internal connector and disable the external connector
- Maximum total current through connector to be 3 amps.
Interval 24 Vdc input connector - 4-way molex:
Pin number | Signal |
|---|---|
1 | 0 VM |
2 | 0 VM |
3 | 24 VM |
4 | 24 VM |
Head connectors
The following sections give pin connection details for connectors on the PHS1 head.
PC data connector
The PC data connector on the PHS1 head is a 15-way high density D plug.
Probe connector
This connector carries two sets of signals from the head.
- Probing system signals from 2-wire and multiwire probes
- Head overtravel switch signals. Switch rated at 30 Vdc, 1 A max
Interval 24 Vdc input connector - 4-way molex:
Pin number | Signal |
|---|---|
1 to 13 | Probe signals |
14 | Overtravel SW |
15 | Overtravel SW |
- Each pin carries different signals depending on the probe type used
- 2-wire probe signals (e.g. TP20, TP6, TP200) are carried on pins 3 (0 V) and 13 (probe signal)
System installation and connection drawings
The illustrations in this section give information on system installation.
Kinematic joint installation and alignment
The PHS1 head must be aligned to the axes of the machine to ensure correct operation with the ACR2 autochange rack. This section describes how to perform plane and rotational alignment of each axis of the head.
D-axis alignment in the horizontal plane
The head must be aligned with the machine axes so that the mounting holes in the probe arm are aligned with the pins of the ACR2 ports.
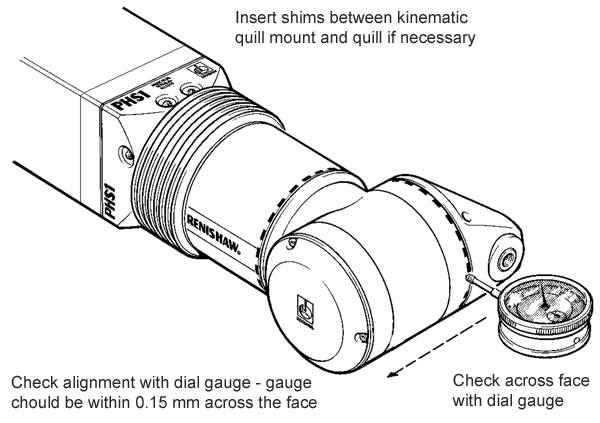
The head must be aligned to within ±0.1° of the CMM axes. It may be necessary to place shims between the kinematic quill mount and the CMM quill to achieve this.
The plane alignment of the D-axis can be checked by clocking the head as shown in the figure below.
Plane alignment of the D axis:
D-axis alignment in the vertical plane
This does not need to be accurately aligned as the rotation in the E-axis can be compensated for any misalignment.
Axis rotation
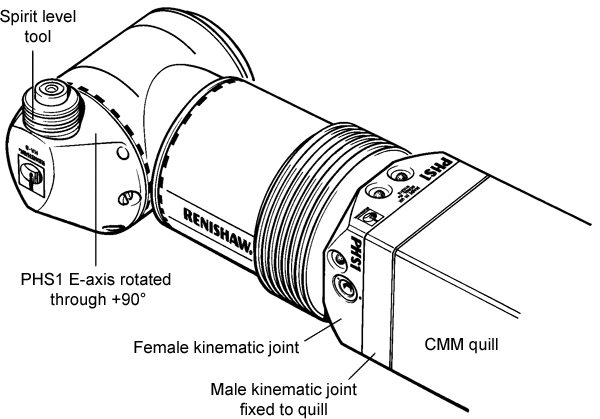
Rotational alignment of the head axes can be found by using the spirit level tool (A-2150-1070). The spirit level should be screwed into a HA8 PHS M8 arm and the arm mounted onto the head. The following procedure describes the method of calculating the individual axes offsets.
1. Rotate the E-axis through +90°.
2. Make small adjustments in the D-axis and E-axis until the bubble indicates the head is level.
3. With the head axes aligned to the CMM axes, subtract the initial rotation of +90° in the E-axis from the E-axis levelled position.
4. These positions are now the angular offsets of each head axis from the datum position.
5. Store these positions in software for that particular head.
Calculation of the individual head axes offsets:
Kinematic joint installation and cable connections
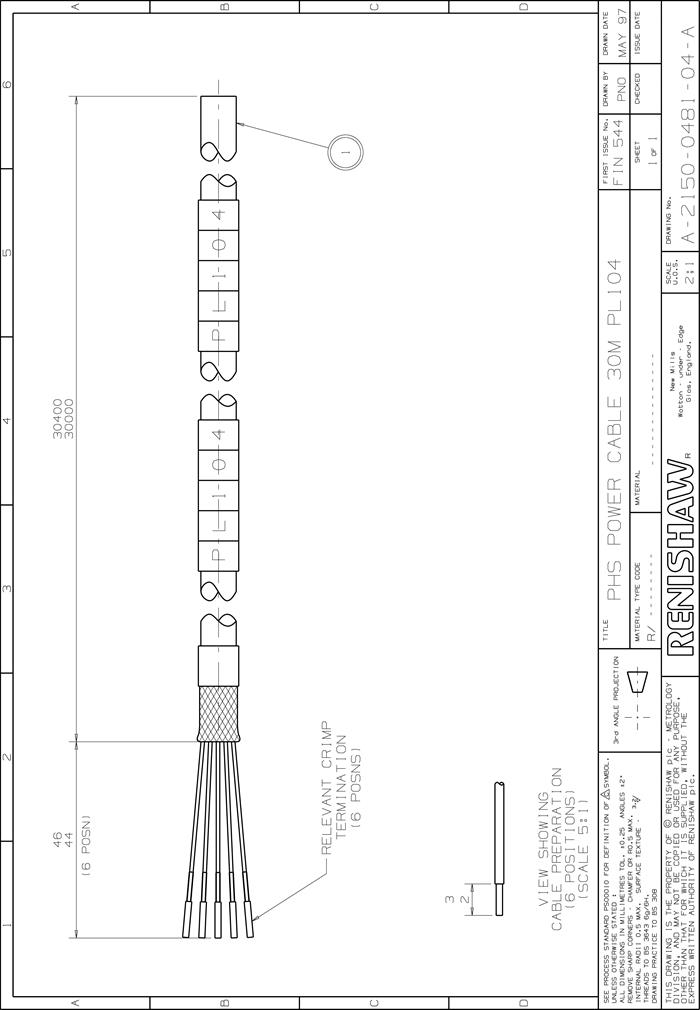
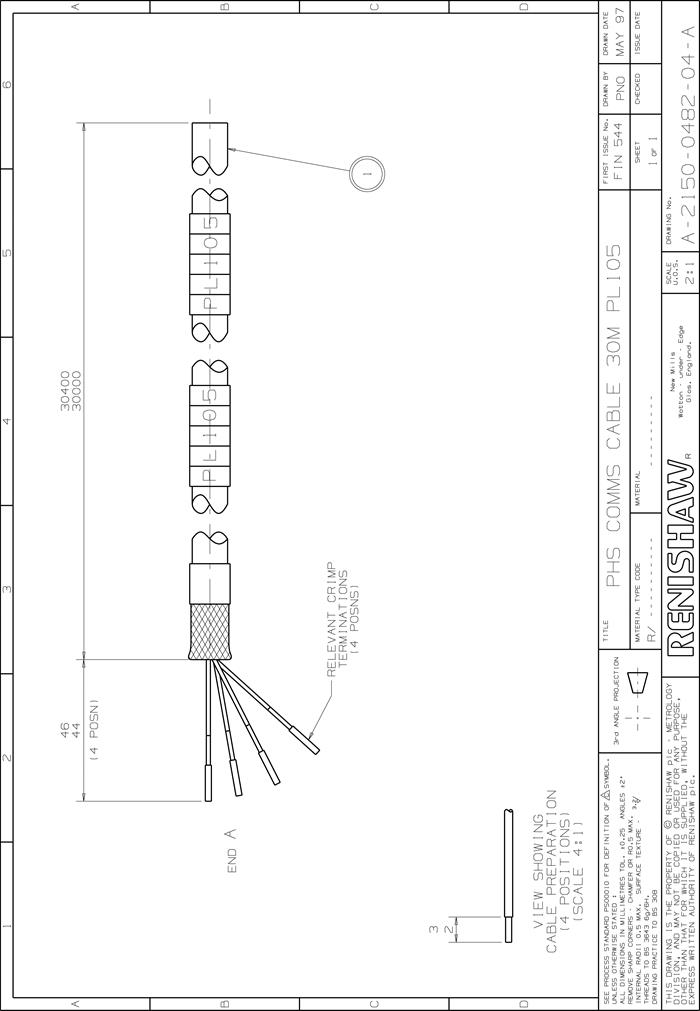
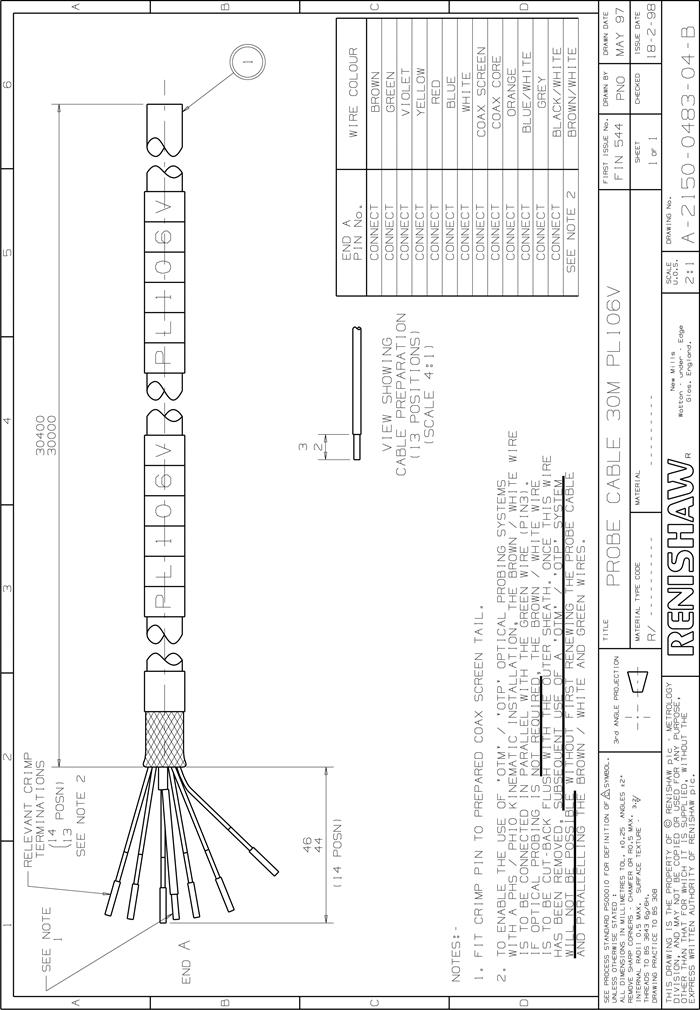
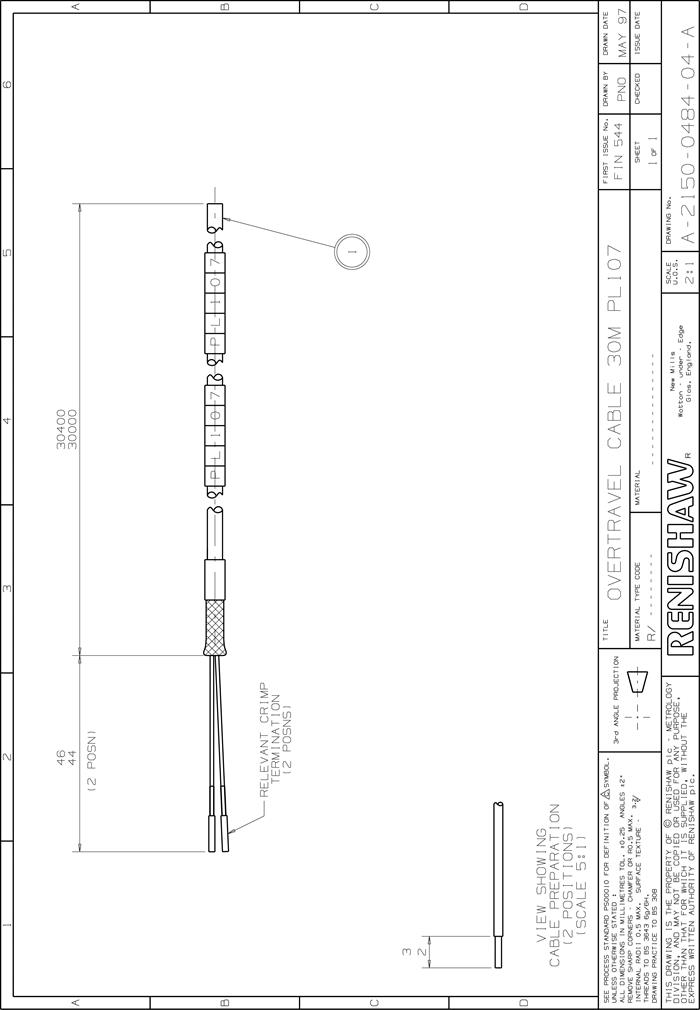
There are four individual cables in the PHS1 system:
- Power cable
- Comms cable
- Probe cable
- Overtravel signal cable
Maximum cable length is 30 m.
NOTE: It is recommended that the resistance of the power cable should be typically 3 W but should not exceed 5 W total loop resistance as a thermal fuse and switch mode power supply are configured to monitor the correct voltage to the head. High cable resistance may trigger the thermal fuse.
This is usually evident by the symptom of a brief power up, approximately 1 or 2 seconds, where the head LED lights before extinguishing. Exchanging heads may appear to solve the problem however this is usually due to electrical tolerance differences between systems.
