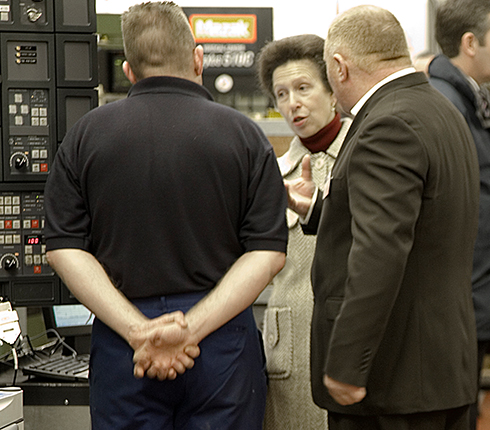
New approach to manufacturing attracts royal interest
Martin Aerospace, a Rolls-Royce subcontractor, has employed high-accuracy Renishaw probes and a GSPS CNC Reporter™ process monitoring package to reduce machining lead times and improve consistency.
Over the past few years Martin Aerospace, a leading supplier of aerospace components based in Lanark, Scotland, has gone from strength to strength. The new management team, led by (Managing Director) Bernie Phimister, has driven the company to achieve world-class manufacturing capability. Rolls-Royce, a key customer, is very pleased with the standards achieved, and has awarded it a new contract to supply an important engine component. Appropriate use of Renishaw probing and CNC Reporter™ software means that the floor-to-floor time for the manufacture of this new component is now significantly improved and more consistent, with a better use of tooling.
HRH The Princess Royal visited Martin Aerospace on the 9th January 2008, in recognition of the company's achievements, and its employees were particularly impressed at how well informed the Princess was about the machining technology. During her visit she commented on the use of Renishaw probe systems on the Coordinate Measuring Machines (CMMs), and was impressed that a Renishaw touch probe was also fitted to one of the machine tools.

New techniques to address new challenges
Manufacturing the Rolls-Royce engine component, which features a complex geometry and very tight tolerances, could have proved very challenging. It is made of Inconel, a material that has to be machined correctly the first time, not lending itself to re-work. As Bernie Phimister comments, “This makes it vital that the machining process is controlled at source, rather than inspecting finished components and attempting to tweak the process afterwards.”
Renishaw looked at the original process and recommended a visit to Renishaw's demonstration centre, after which Martin Aerospace had a high-accuracy MP700 touch probe fitted to the twin chuck mill-turn machine producing the part. The probe is used to measure the finished size of several features, with the operator using the printed results to update machining offsets.

Better use of the measured data
Colin Tonnar, Quality Manager, explains further, “The probe was a big improvement, but there was still a manual element with the interpretation of the results. This is why we have recently introduced CNC Reporter, a process monitoring package provided by GSPS, which allows better use of the data that the probe provides.”
After each component has been machined critical features are inspected with the Renishaw MP700 touch probe, with measured values recorded by CNC Reporter. These values are plotted on an SPC (Statistical Process Control) chart and used to constantly adjust the process.
Grooves that take seal rings are coated and then ground with driven tooling on the mill-turn machine to within 4 tenths of a thou, an incredibly tight tolerance. This tolerance is now achieved reliably under the watchful eye of the CNC Reporter software.
Jim McFarlane, machine operator and programmer, is very pleased with the touch probe and new CNC Reporter software – “It's an instant indicator, very easy to see the trend of the process. I can keep dimensions within the control limits and easily keep a record of every measured value.”
Process improvement - an added bonus
There are also 4 machined holes that were being cut with new and re-ground tools, which went out of tolerance after cutting about 40 holes. CNC Reporter has collated the results that prove that it is cost effective to only use new tooling, which although more expensive, can cut over 80 holes, before going out of tolerance. There's also the added benefit of less downtime changing tooling. Jim McFarlane feels vindicated – “for a long time I've thought that on tightly toleranced work, re-ground tools were a false economy, now I can prove it.”
All of this adds up to some impressive time savings – machining and manually inspecting the component used to take a long time, particularly when the machine was stopped whilst the operator worked out the best way of adjusting the offsets. The new process has radically improved the time per part and, as Colin Tonnar explains, “we're confident we can bring that time down more. These improvements mean that we are measuring a true ‘chip to chip' time – the machine is constantly running.”
Process capability - another added bonus
Colin Tonnar continues, “All the components are inspected on the CMM and go out with traceable inspection reports. That's the same as before. The big change is that we are also able to show our customers, with the SPC charts, that we run a reliable and well controlled process. They can have confidence that we will continue to supply the right quality of parts on time.” He concludes, “We plan to be rolling this system out to more machines and training more operators in programming the probes and using CNC Reporter.”
Martin Aerospace was started 30 years ago to do work for the steel industry, with some aerospace and offshore work. 16 years ago the Martin family bought the company out and renamed it GT Martin and Sons Ltd. Over the years the company has progressively developed its aerospace business and changed its name to Martin Aerospace Ltd in 2006. Today it is a supplier of quality components, assembly and integration services to the aerospace industry.
The extensive manufacturing capability boasts state of the art equipment and the company is committed to maintaining leading edge technology in its manufacturing operation. As the company develops it is taking on more large batch work for the latest aero engines, and is proud to play its part in one of the most demanding industries in the world.