Navigation
MIH installation
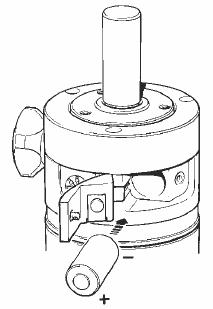
Fitting the battery
- Move MIH to axis positions A0.0, B0.0 and lock up.
- Unscrew housing retaining screw.
- Open housing door.
- Insert battery as shown (negative end first).
- Close door and secure retaining screw (do not overtighten).
- Reset datum (See 'Datum mode').
NOTE: Incorrect insertion of the battery will not cause damage to the MIH.
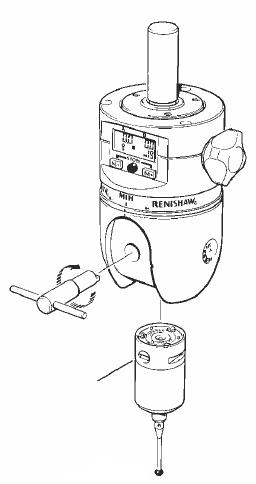
Fitting the probe
- Offer up the female autojoint with key slot facing as shown.
- Using an S10 autojoint key, insert into access hole and locate blade in key slot.
- Rotate clockwise to lock the autojoint.
- Once qualified, probe / stylus combinations may be interchanged without the need to re-qualify.
- After changing a probe, unlock and re-lock the head to ensure repeatability.
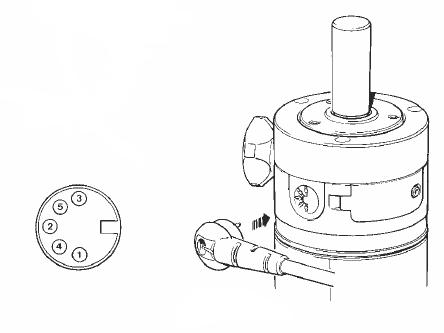
Pin connections
- Insert Renishaw 5-pin DIN plug into socket.
- Head LED cathode
- Ground
- Head LED anode
- Probe circuit
- Probe circuit
Quill mounting
Ensure that the head is securely mounted onto the CMM quill. Any rotational movement occurring during use will result in a loss of repeatability of positional data.
CAUTION: Always fit mounting shanks with the screws supplied (M3 × 5 mm (0.20 in) long). The use of incorrect screws may cause serious internal damage to the head.